New Ticket Priority in BizCore System
Ticket Priorities in BizCore allow you to categorize support tickets based on their urgency or importance. This ensures that your support team can respond to critical issues promptly and manage workloads more efficiently. This guide provides a step-by-step process to create and manage ticket priorities within the system.
Access the Ticket Priority Setup
1. Log in to your BizCore administrator account.
2. From the main dashboard, click on Setup in the sidebar or top navigation menu.
3. Select Support to expand the support configuration options.
4. Click Ticket Priority to open the list of existing ticket priorities.
5. Click the + New Priority button to create a new priority.

Configure the New Priority
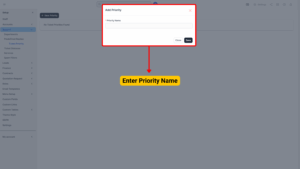
You will be taken to a form where you can enter the priority details.
| Field | Description |
|---|---|
| Priority Name* | Enter a descriptive name for the priority (e.g., Low, Normal, High, Urgent). (Required) |
Note
Use a clear naming convention that your team can easily understand. If you use color codes or labels, ensure they are consistent with your internal workflow.

Save the Ticket Priority
1. Double-check the priority name for clarity and accuracy.
2. Click Save to create the new priority.
3. The newly created priority will now appear in the list of ticket priorities and can be assigned to tickets manually or automatically (if automation rules are configured).
Managing Ticket Priorities
After creating ticket priorities, you can manage them easily:
-
Edit: Click the Edit icon next to a priority name to update it if necessary.
-
Delete: Remove any unused or redundant priorities by clicking the Delete icon. (Use caution — deleting a priority may affect tickets currently assigned to it.)
Creating Ticket Priorities in BizCore is a simple yet powerful way to optimize your support process. By categorizing tickets by urgency, you can ensure that critical issues receive immediate attention while maintaining an organized and efficient helpdesk workflow.