Bizcore Payment Gateway Setup Guide
Bizcore supports multiple payment gateways to help you manage online payments efficiently. Setting up your payment gateways correctly ensures smooth transaction processing, accurate financial tracking, and a seamless experience for your clients.
Follow the steps below to configure the Payment Gateways section in Bizcore:
Navigate to Payment Gateway Settings
1. Log in to your Bizcore System using an administrator account.
2. Go to Setup from the main dashboard menu.
3. Click Settings.
4. Under the Finance section, select Payment Gateways.
This will open the configuration panel containing all available gateway settings.
Configure Payment Settings
1. General
These are global settings for all payment gateways:
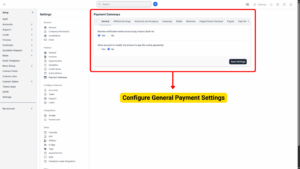
a) Receive Notification When Account Pays Invoice (Built-in)
– Tick Yes to receive admin notifications whenever a customer makes a payment.
– Tick No if you do not want to receive notifications (not recommended).
b) Allow Account to Modify the Amount to Pay (for Online Payments)
– Tick Yes to allow clients to partially pay invoices by entering a custom payment amount.
– Tick No to require clients to pay the full invoice amount.
– Recommended: Keep this disabled unless partial payments are part of your business model.
2. Affiliate Earnings
If your business runs an affiliate program, you can allow affiliates to use their earnings to pay invoices.
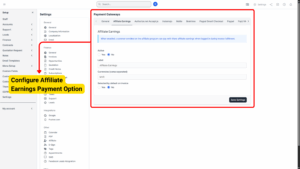
a) Active – Tick Yes to enable this feature.
b) Label – Enter a custom label (e.g., “Use Affiliate Earnings”).
c) Currencies (Comma Separated) – Enter supported currencies (e.g., MYR, USD).
d) Selected by Default on Invoice – Tick Yes if you want this option automatically pre-selected during checkout.
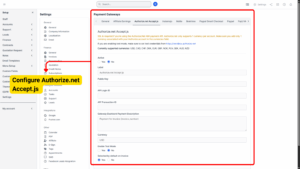
3. Authorize.net Accept.js Setup
Authorize.net Accept.js is a secure payment gateway integration that allows you to process online payments directly through your system. Below are the details for setting it up:
a) SSL Requirement
– This gateway requires HTTPS for secure transactions.
– Make sure your website or application has a valid SSL certificate installed before enabling this gateway, as Authorize.net will not allow unencrypted connections for payment processing.
b) Test Mode
Before going live, you can use Authorize.net Sandbox credentials to test the payment flow:
– This allows you to simulate transactions without processing real payments.
– Recommended for initial setup to confirm everything is working (API keys, callbacks, and invoice creation).
– Once confirmed, switch to live credentials for real transactions.
c) Active (Yes/No)
Choose Yes to enable this payment gateway, or No to disable it.
d) Label
The name that will be displayed to your clients on invoices and payment pages (e.g., “Credit Card (Authorize.net)”).
e) Public Key
Enter your Authorize.net Accept.js Public Client Key. This is required for secure tokenization of card details before sending them to Authorize.net.
f) API Login ID
Your unique Authorize.net API Login ID (found in your Authorize.net account under API Credentials).
g) API Transaction Key
Enter the Transaction Key from Authorize.net, which is used for authentication and secure communication with the gateway.
h) Gateway Dashboard Payment Description
This description will appear in your Authorize.net dashboard for transactions made through this gateway, making it easier to track and identify them.
i) Currency
Select the currency you will accept for payments. This must match your Authorize.net account configuration.
j) Enable Test Mode (Yes/No)
Yes – Use Sandbox mode for testing transactions.
No – Live mode for real transactions.
– This should be set to No when your system is live.
k) Selected by Default on Invoice (Yes/No)
Yes – This payment method will be automatically pre-selected when clients view their invoices.
No – Clients will have to manually select this payment method from the available options.
4. Instamojo
Instamojo is an online payment gateway that enables you to collect payments from customers using multiple payment methods such as debit/credit cards, UPI, and net banking. Setting it up correctly ensures smooth and secure transactions.

a) Active (Yes/No)
Yes – Enables Instamojo as a payment option for your clients.
No – Disables Instamojo, and it will not appear as a payment method.
b) Label
– The name displayed to clients on invoices or the payment page.
– Example: “Pay with Instamojo” or “Online Payment – Instamojo”.
c) Fixed Fee
– A fixed charge applied per transaction (if any).
– Example: If you enter 5.00, an additional flat fee of 5.00 will be applied to every payment made via Instamojo.
d) Percentage Fee
– A percentage fee charged per transaction.
– Example: If you enter 2.5, an additional 2.5% of the invoice total will be charged.
– You can use this field to recover gateway charges.
e) Private API Key
– This is your unique API Key from Instamojo, required to connect your system with Instamojo’s payment gateway securely.
– You can find this key in your Instamojo dashboard under API & Plugins → API Key & Auth Token.
f) Private Auth Token
– The Auth Token that works with the API Key for secure communication.
– Both API Key and Auth Token must be entered correctly, otherwise transactions will fail.
g) Gateway Dashboard Payment Description
– The description that will appear in your Instamojo merchant dashboard for payments processed through this gateway.
– Example: “Invoice Payment – [Company Name]” or “Order #[Invoice Number] Payment”.
h) Enable Test Mode (Yes/No)
Yes – Enables sandbox mode for testing transactions without processing real payments.
– Use this during setup to verify everything is working correctly. You will need to use Instamojo’s test API credentials in this mode.
No – Disables sandbox mode and switches to live payments.
– Use this only after successful testing to start collecting real payments.
i) Selected by Default on Invoice (Yes/No)
Yes – Instamojo will be automatically pre-selected as the default payment method when a client views an invoice.
No – Clients will have to manually select Instamojo from the list of available payment options.
5. Mollie
Mollie is a popular European payment gateway that supports multiple payment methods like iDEAL, Bancontact, PayPal, SEPA, credit cards, and more. Configuring Mollie correctly ensures that your customers have a smooth payment experience.
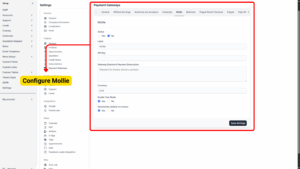
a) Active (Yes/No)
Yes – Enables Mollie as a payment option for your clients.
No – Disables Mollie, and it will not appear as a payment option.
b) Label
– The name displayed to clients on invoices or during checkout.
– Example: “Pay via Mollie” or “Credit/Debit Card (Mollie)”.
– Choose a label that clearly communicates the payment method to your clients.
c) API Key
– Your unique API Key provided by Mollie, used to authenticate and connect your system with the Mollie platform.
– You can find this key in your Mollie dashboard under Developers → API Keys.
– Make sure to use the Test API Key when in test mode and the Live API Key when you are ready to process real payments.
d) Gateway Dashboard Payment Description
– This is the description that will appear in your Mollie dashboard for transactions made through this integration.
– Example: “Invoice Payment – [Company Name]” or “Order #[Invoice Number] Payment”.
e) Currency
– Define the currency you want to use for this payment gateway.
– Mollie supports multiple currencies (e.g., EUR, USD, GBP).
– Make sure the currency matches your company’s financial settings and Mollie account configuration.
f) Enable Test Mode (Yes/No)
Yes – Activates sandbox mode, allowing you to run test transactions without using real money.
– You must use Mollie’s Test API Key for this to work. Ideal for checking whether payments are being recorded correctly and whether invoices are updated automatically.
No – Switches to live mode for processing actual payments from clients.
– Replace the Test API Key with your Live API Key before enabling live mode.
g) Selected by Default on Invoice (Yes/No)
Yes – Mollie will be automatically pre-selected as the default payment option when clients view an invoice.
No – Clients will need to manually choose Mollie from the list of available payment gateways.
6. Braintree
Braintree is a robust payment gateway that supports credit cards, debit cards, PayPal, and other payment methods in a single integration. It is widely used for its reliability and ease of setup.
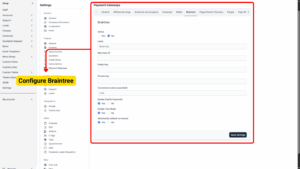
a) Active (Yes/No)
Yes – Enables Braintree as a payment option for your clients.
No – Disables Braintree, and it will not be available for invoice payments.
b) Label
– This is the name that will appear to your clients when selecting the payment option.
– Example: “Pay via Braintree” or “Credit/Debit Card (Braintree)”.
c) Merchant ID
– A unique identifier for your Braintree merchant account.
– It is required to connect your system with Braintree’s API.
d) Public Key
– Your Braintree public key used for authenticating API requests.
– Found in the API Keys section of your Braintree dashboard.
e) Private Key
– Your Braintree private key used along with the Merchant ID and Public Key for secure communication with Braintree.
– Keep this safe and do not share it publicly.
f) Currencies (comma-separated)
– Specify the currencies you want to support for this gateway.
– Example: USD,EUR,GBP
– Make sure the currencies match those configured in your company’s finance settings.
g) Enable PayPal Payments (Yes/No)
Yes – Allows your clients to pay using PayPal through your Braintree account.
No – Limits Braintree to card transactions only (credit and debit cards).
Tip
If you already have PayPal as a separate payment gateway, you may leave this set to No to avoid confusion.
h) Enable Test Mode (Yes/No)
Yes – Activates sandbox mode, allowing you to test transactions without processing real payments.
– You must use sandbox credentials from your Braintree account. Perfect for verifying that payments are recorded and invoices update correctly.
No – Switches to live mode and starts accepting real transactions.
– Make sure you replace sandbox credentials with live credentials before switching.
i) Selected by Default on Invoice (Yes/No)
Yes – Automatically selects Braintree as the default payment option when clients open an invoice.
No – Requires clients to manually choose Braintree from the list of payment gateways.
7. PayPal Smart Checkout
PayPal Smart Checkout is an advanced payment solution that allows customers to pay quickly using their PayPal account, debit/credit card, or other PayPal-supported payment methods. It offers a modern checkout experience and supports multiple currencies.
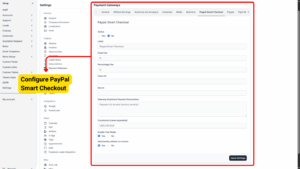
a) Active (Yes/No)
Yes – Enables PayPal Smart Checkout as a payment option for your clients.
No – Disables it, and it will not be available during invoice payment.
b) Label
– The name shown to your clients on invoices and payment screens.
– Example: “Pay with PayPal” or “Pay via PayPal Smart Checkout”.
c) Fixed Fee
– The fixed amount you want to charge per transaction (if any).
– Example: If you set 2.00, every payment will have an additional $2 fee.
– You can leave it as 0 if you don’t want to charge a fixed fee.
d) Percentage Fee
-The percentage of the invoice amount you want to charge as an additional fee.
– Example: If you set 2.5, it will add 2.5% to the total invoice amount.
– This can be useful to cover PayPal processing fees.
e) Client ID
– The unique Client ID generated from your PayPal Developer account.
– You can find this under PayPal Developer Dashboard → REST API Apps → Your App.
– Use sandbox credentials for test mode and live credentials for production.
f) Secret
– The secret key associated with the Client ID, used to securely connect your system with PayPal’s API.
– Keep this private and do not share it publicly.
g) Gateway Dashboard Payment Description
– A description that will appear in your PayPal dashboard for payments received.
– Example: “Invoice Payment – [Company Name]” or “Order #[Invoice Number] Payment”.
h) Currencies (comma-separated)
– Specify the currencies you want to support for PayPal Smart Checkout.
– Example: USD,EUR,GBP,MYR
– Make sure your PayPal account supports all currencies you select.
i) Enable Test Mode (Yes/No)
Yes – Activates sandbox mode, allowing you to process test transactions without charging real money.
– You must use sandbox Client ID and Secret from your PayPal Developer account. Ideal for testing whether payments are processed correctly and invoices update automatically.
No – Switches to live mode for real transactions.
– Replace sandbox credentials with live credentials before going live.
j) Selected by Default on Invoice (Yes/No)
Yes – Automatically pre-selects PayPal Smart Checkout as the default payment option when clients open an invoice.
No – Requires clients to manually choose PayPal Smart Checkout during payment.
8. Paypal
This section allows you to configure PayPal Standard API as a payment gateway for your invoices and client payments. This integration lets your customers pay via their PayPal account or credit/debit card using PayPal’s secure checkout page.
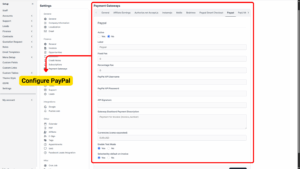
a) Active (Yes/No)
– Select Yes to enable PayPal Standard API as an available payment option.
– Select No to disable it (it will not show on client invoices).
b) Label
– The name that will be displayed to clients on the invoice payment page.
– Example: “Pay with PayPal” or “PayPal Secure Checkout.”
c) Fixed Fee
– Enter a fixed fee amount that will be added to every payment made using PayPal Standard API.
– Example: 2.00 will add a flat RM 2.00 (or your chosen currency) per transaction.
d) Percentage Fee
– Enter the percentage of the total amount that will be charged as a fee.
– Example: 3.0 means 3% of the invoice total will be added as a PayPal processing fee.
e) PayPal API Username
– This is the API Username from your PayPal business account (found under API Credentials).
– It is required for authentication and must be copied exactly as shown in your PayPal dashboard.
f) PayPal API Password
– The API Password from your PayPal account.
– This acts as a secure credential to allow your system to connect with PayPal.
g) API Signature
– A unique signature generated in your PayPal account that validates your integration.
– This must be copied exactly from your PayPal API credentials page.
h) Gateway Dashboard Payment Description
– The text that will appear in your PayPal Dashboard transaction history for easier tracking.
– Example: “Invoice Payment – {invoice_number}” or “Company Name Payment.”
i) Currencies (comma-separated)
– Enter all currencies supported by your PayPal account, separated by commas.
– Example: USD,EUR,GBP
j) Enable Test Mode (Yes/No)
– Select Yes to enable Sandbox Mode for testing purposes.
– This will allow you to test transactions without using real money.
– Make sure to use Sandbox API Credentials (Username, Password, Signature) when test mode is enabled.
– Select No to use Live Mode for real transactions.
k) Selected by Default on Invoice (Yes/No)
– Select Yes if you want PayPal Standard API to be pre-selected as the default payment method on all invoices.
– Select No if you want clients to manually choose PayPal from available payment gateways.
9. PayU Money
PayU Money is a payment gateway that allows customers to pay using a variety of methods such as credit/debit cards, net banking, and digital wallets. You can configure it here to enable secure online payments for your invoices.
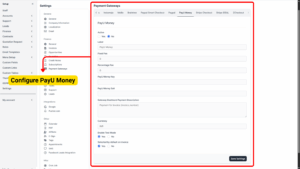
a) Active (Yes/No)
– Select Yes to enable PayU Money as a payment option for invoices.
– Select No to disable it (it will not appear for clients during checkout).
b) Label
– The display name of the payment method shown to clients.
– Example: “Pay with PayU Money” or “Secure PayU Payment.”
c) Fixed Fee
– Enter a fixed charge that will be added to each payment processed via PayU Money.
– Example: 2.50 will add a flat RM 2.50 (or your chosen currency) per transaction.
d) Percentage Fee
– Enter the percentage of the invoice total that will be charged as a payment processing fee.
– Example: 2.5 means 2.5% of the invoice amount will be added as a gateway fee.
e) PayU Money Key
– This is your Merchant Key provided by PayU Money.
– It uniquely identifies your PayU account and is required for the payment integration to work.
f) PayU Money Salt
– The Salt Key from PayU Money used for security purposes.
– It is combined with the Merchant Key to generate secure hash values for transactions.
g) Gateway Dashboard Payment Description
– The description that will appear in your PayU Money merchant dashboard for easier reference.
– Example: “Invoice Payment – {invoice_number}” or “Company Payment.”
h) Currency
– The currency in which PayU Money will process the payments.
– Example: INR (PayU Money is mainly used for Indian Rupee transactions).
i) Enable Test Mode (Yes/No)
– Select Yes to enable sandbox/test mode, allowing you to simulate transactions without charging real money.
– Use Test Merchant Key and Salt provided by PayU Money for this mode.
– Select No to process real, live payments using your production credentials.
j) Selected by Default on Invoice (Yes/No)
– Select Yes to make PayU Money the default pre-selected payment option for clients.
– Select No if you want clients to manually select PayU Money from available payment methods.
10. Stripe Checkout Setup
Stripe Checkout is a secure and modern payment gateway that allows clients to pay using credit cards, debit cards, Apple Pay, Google Pay, and more. It provides a mobile-friendly checkout experience and supports a wide range of currencies worldwide.
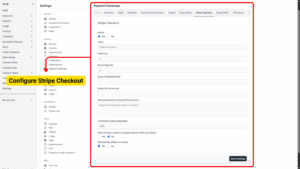
a) Active (Yes/No)
Yes – Enables Stripe Checkout as a payment option for your clients.
No – Disables Stripe Checkout so it won’t appear during payment.
b) Label
– The name that appears on invoices and payment screens.
– Example: “Pay with Stripe” or “Credit/Debit Card (Stripe)”.
c) Fixed Fee
– The flat amount you want to charge per transaction.
– Example: If set to 3.00, each payment will include an additional $3 fee.
– Set to 0 if you do not want to add a fixed fee.
d) Percentage Fee
– The percentage of the invoice amount you want to charge as an additional fee.
– Example: Setting 2.5 will add 2.5% to the total amount.
– This is useful for covering Stripe’s processing fees if you pass them on to clients.
e) Stripe Publishable Key
– The public key from your Stripe account used to display the payment form securely.
– Found in Stripe Dashboard → Developers → API Keys.
– Use the test publishable key in sandbox mode, and switch to the live key when ready for real payments.
f) Stripe API Secret Key
– The private key that securely authorizes your system to communicate with Stripe’s API.
– Keep this secret safe and never share it publicly.
g) Gateway Dashboard Payment Description
– A description that will appear in your Stripe dashboard for payments received.
– Example: “Invoice Payment – [Company Name]” or “Payment for Invoice #[Invoice Number]”.
h) Currencies (comma-separated)
– Specify the currencies you want to support for Stripe payments.
– Example: USD,EUR,MYR,GBP
– Make sure your Stripe account supports the currencies you list here.
i) Allow Primary Contact to Update Stored Credit Card Token (Yes/No)
Yes – Allows the client’s primary contact to update or replace their saved card on file for recurring payments or subscriptions.
No – Prevents clients from updating stored card details themselves.
j) Selected by Default on Invoice (Yes/No)
Yes – Pre-selects Stripe Checkout as the default payment method when clients open an invoice.
No – Clients must manually choose Stripe Checkout from the list of available gateways.
11. Stripe iDEAL
Stripe iDEAL is the older version of Stripe’s integration for iDEAL payments (commonly used in the Netherlands). Stripe has deprecated this gateway and recommends migrating to Stripe iDEAL V2 (available as a separate module). If you still need to use this older version, follow the steps below carefully.
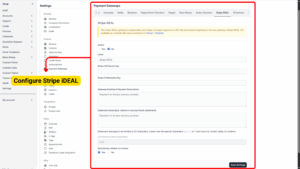
a) Active (Yes/No)
Yes – Enables Stripe iDEAL as a payment option for your clients.
No – Disables this option and hides it from the payment screen.
b) Label
– The display name your clients will see.
– Example: “Pay via iDEAL” or “Stripe iDEAL Payment”.
c) Stripe API Secret Key
– The secret key from your Stripe account for authenticating transactions.
– Located in Stripe Dashboard → Developers → API Keys.
– Use test keys for sandbox mode and live keys for production.
d) Stripe Publishable Key
Your public key from Stripe, required for securely rendering the payment form.
e) Gateway Dashboard Payment Description
– The description that appears in the Stripe dashboard for payments made through iDEAL.
– Example: “Invoice Payment – [Company Name]”.
f) Statement Descriptor
– The text that will appear on your client’s bank statement.
– Must be 22 characters or fewer.
– Cannot use special characters like <, >, ', ", * and cannot consist solely of numbers.
– Example: “Bizcore Invoice Payment”.
g) Selected by Default on Invoice (Yes/No)
Yes – Automatically selects Stripe iDEAL for the client when they open an invoice.
No – Requires clients to manually choose this payment method.
12. 2Checkout Payment Gateway Setup
2Checkout (now Verifone) is a global payment platform that supports credit cards, PayPal, and localized payment methods. Setting it up correctly will allow clients worldwide to pay invoices easily.
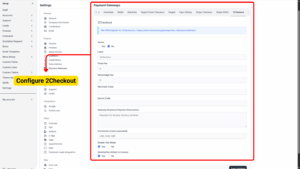
a) Active (Yes/No)
Yes – Enables 2Checkout as a payment option.
No – Disables 2Checkout from being used.
b) Label
– The name shown to clients for this payment option.
– Example: “Pay via 2Checkout” or “Secure Card Payment (2CO)”.
c) Fixed Fee
– A flat amount charged for each transaction (optional).
– Example: 2.00 would add a $2 fee per transaction.
d) Percentage Fee
– The percentage of the invoice total added as a processing fee.
– Example: 3.5 would add 3.5% to the invoice amount.
e) Merchant Code
– Your unique 2Checkout merchant code used to identify your account.
– Found in your 2Checkout Dashboard under Integrations → Webhooks/API.
f) Secret Code
Used for secure communication between Bizcore and 2Checkout to validate transactions.
g) Gateway Dashboard Payment Description
– The description that will appear in your 2Checkout dashboard when clients make payments.
– Example: “Invoice #[Number] Payment”.
h) Currencies (comma-separated)
– Define which currencies are allowed for this gateway.
– Example: USD,EUR,MYR
i) Enable Test Mode (Yes/No)
Yes – Runs in sandbox mode so you can simulate payments without charging real money. Use sandbox credentials provided by 2Checkout.
No – Switches to live mode for real transactions.
j) Selected by Default on Invoice (Yes/No)
Yes – Automatically selects 2Checkout as the payment method when the client views an invoice.
No – The client must manually choose it from the list of available payment options.
Save Your Settings
Once all gateways have been configured:
-
Review all credentials, fees, and toggles carefully.
-
Scroll down and click Save Settings.
-
Bizcore will confirm that your payment gateway settings are successfully updated.