How to Create and Configure Contact Roles
Contact Roles in the BizCore system allow you to define the level of access and communication privileges for contacts (e.g., clients, partners) associated with your organization. By setting up Contact Roles properly, you control what information external contacts can view or interact with and which email notifications they receive.
This guide provides a detailed walkthrough for creating new Contact Roles, assigning permissions, and configuring notification preferences.
Prerequisites
Before setting up Contact Roles, ensure that you:
– Have administrator or configuration permissions in BizCore.
– Understand the different contact types you work with (e.g., Client, Supplier, Partner).
– Decide what level of system access and notifications each contact type should have.
Access Contact Roles
1. Log in to your BizCore administrator account.
2. Navigate to Setup from the main menu.
3. Under the Roles section, click Contact Roles.
You will see a list of existing Contact Roles configured in the system.
Create a New Contact Role
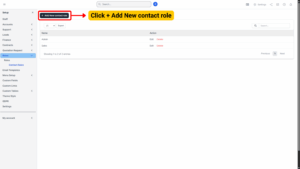
1. Click + Add New Contact Role.
2. A new Contact Role configuration screen will open.
Enter Role Details

| Field | Description |
|---|---|
| Name * | Enter a descriptive name for the contact role (e.g., “Client – Finance,” “Project Collaborator”). |
Note
Use role names that clearly describe the contact’s function or relationship to your business. This helps internal staff assign roles quickly and accurately.

Configure Permissions
In the Permissions section, specify what this contact role can access. Tick the checkboxes for the following features as needed:
| Permission | Description |
|---|---|
| Invoices | Allows the contact to view or interact with their invoices. |
| Quotations | Grants access to view quotations assigned to them. |
| Contracts | Allows the contact to view contracts related to their account. |
| Opportunities | Enables the contact to see sales opportunities they are involved in. |
| Support | Grants access to submit or track support tickets. |
| Projects | Allows the contact to view assigned projects or project updates. |
Configure Email Notifications
Scroll down to the Email Notifications section. Tick the boxes for the notifications this contact role should receive:
| Notification | Description |
|---|---|
| Invoice | Notifies the contact when a new invoice is issued. |
| Credit Note | Sends a notification for issued credit notes. |
| Tickets | Alerts the contact about updates to support tickets. |
| Quotation | Notifies the contact when a new quotation is created or updated. |
| Contract | Sends notifications about contract updates or renewals. |
| Project | Notifies the contact about project milestones or changes. |
| Task | Alerts the contact when they are assigned or mentioned in a task. |
Save the Contact Role
1. Review all selections for accuracy.
2. Click Save to finalize the new contact role.
3. The role will now appear in the list and can be assigned to contacts as needed.