BizCore System Setup: Creating Web-to-Lead Forms
The Web-to-Lead feature in BizCore enables you to create customizable lead capture forms that can be embedded directly on your website. When a visitor submits the form, their details are automatically added as a lead in your CRM system. This streamlines lead generation, reduces manual data entry, and ensures your team can act on leads promptly.
This guide provides a comprehensive step-by-step walkthrough to help you create a Web-to-Lead form, configure its appearance, submission behavior, notifications, and embed it on your website.
Access the Setup Menu
1. Log in to your BizCore Admin Panel with administrator privileges.
2. From the left-hand navigation panel, click Setup.
3. Under Setup, select Leads.
4. Click Web-to-Lead to view existing forms.
Create a New Web-to-Lead Form
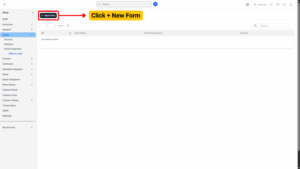
1. On the Web-to-Lead page, click the + New Form button at the top-right corner.
2. You will see four configuration sections: General, Branding, Submission, and Notifications.
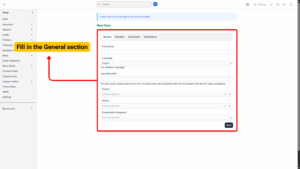
a) Configure the General Section
In the General section, provide the basic form details:
| Setting / Field | Description |
|---|---|
| Form Name (Required) | Enter a clear and descriptive name for the form to help identify it later. |
| Language (Required) | Select the language for form validation messages to match your audience. |
| Lead Title Prefix (Optional) | Add a custom prefix for all leads generated through this form for easy tracking. |
| Source (Required) | Choose the lead source to categorize where the lead originated from. |
| Status (Required) | Set the default status that will be applied to leads generated by this form. |
| Responsible (Assignee) (Required) | Assign a staff member who will be responsible for managing the new leads. |
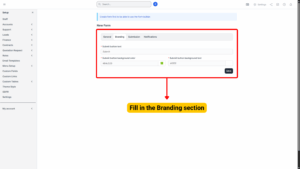
b) Configure the Branding Section
Define the look and feel of the form’s submit button:
| Setting / Field | Description |
|---|---|
| Submit Button Text (Required) | Enter the text that will appear on the submit button (e.g., Submit, Send Request). |
| Submit Button Background Color (Required) | Choose the button’s background color using a color picker or hex code (e.g., #007BFF). |
| Submit Button Text Color (Required) | Set the button’s text color to ensure good readability and contrast (e.g., white on blue background). |
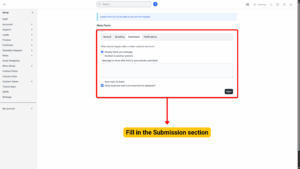
c) Configure the Submission Section
Decide what happens after form submission:
| Setting / Field | Description |
|---|---|
| After Submission Behavior (Required) | Choose what happens after a form is submitted: display a thank-you message or redirect to another website. |
| Message to Show After Form Submission (Required if displaying message) | Enter the confirmation message to show users after submission (e.g., Thank you for contacting us! We will get back to you shortly.). |
| Auto Mark as Public | Tick if all leads should be visible to multiple staff members. |
| Allow Duplicate Leads | Tick if the same person can submit multiple leads. Leave unticked to prevent duplicates. |
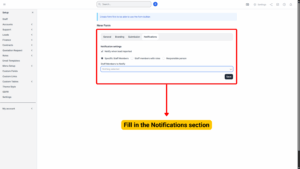
d) Configure Notifications
Determine how your team is alerted when a lead is captured:
| Setting / Field | Description |
|---|---|
| Notify When Lead Imported | Tick to send notifications when a new lead is created. |
| Notification Recipients | Choose who should receive notifications: Specific Staff Members, Staff Members with Roles, or the Responsible Person. |
e) Save the Form
1. Review all entries for accuracy.
2. Click Save.
3. After saving, two new tabs appear in the form area:
Form Builder – Build and adjust all fields in the form.
Integration Code – Contains the code to embed the form on your website. Each form has a unique key.
Building the Form
a) Form Builder
Once saved, you’ll be automatically directed to the Form Builder tab:
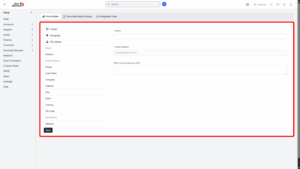
– On the left side, you’ll see all available form fields, including custom fields (except Hyperlink type).
– To add a field, drag it to the right-side form area. Once added, it cannot be added again.
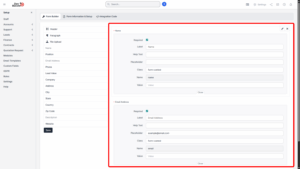
b) Customizing Fields
You can customize fields by:
– Editing labels
– Adding help text or placeholders
– Marking them as required
Hover over a field to see Edit and Remove buttons.
Save and Get Integration Code
After customization:
1. Click Save at the bottom left.
2. Switch to the Integration Code tab to copy the code.
3. The form is embedded as an iframe; adjust width and height as needed.
By default, fields are full-width in a single column. You can use custom classes to create multi-column layouts (up to 12 columns per row).
Note
Never leave the form without required fields. By default, the name field will be required and it’s not recommended to uncheck as required.

BizCore’s Web-to-Lead forms automate capturing and organizing leads directly from your website. By carefully configuring settings, customizing fields, and embedding the form properly, your team can respond faster, track leads efficiently, and improve conversion rates. Multi-column layouts and custom fields make your forms both functional and visually appealing.