Contract Setup and Management
Overview
The Contract feature in the Purchase module allows buyers to create, manage, and sign contractual agreements directly related to approved purchase orders.
Once a contract is created, it is automatically made available in the vendor’s portal, ensuring transparency and easy collaboration between buyers and vendors.
This feature streamlines the procurement process by:
– Reducing the need for manual paperwork,
– Enabling digital signatures,
– Providing a structured communication space for both parties, and
– Ensuring that contract records are securely stored and easily accessible.
Access Permissions
To use the contract management feature effectively:
– Users must have access rights to the Contract menu within the Purchase module.
– The purchase order must be in Approved status before a contract can be linked to it.
– Only authorized employees can sign contracts on behalf of the organization.
– Vendors can view and discuss contract content through their vendor portal.
Navigating to Contract Management
1. Log in to the Admin Portal.
2. From the left sidebar, go to the Purchase module.
3. Select the Contracts menu to access all contract-related features.
Creating a Contract
Step 1: Access Contract Menu
– Navigate to Contracts under the Purchase module.
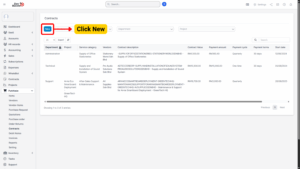
Step 2: Create New Contract
– Click the “New” button on the Contracts page.
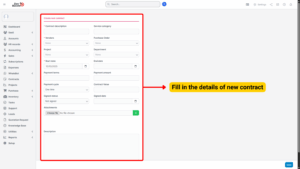
Step 3: Fill in Required Details
1. In the Create Contract form, provide the following information:
| Field Name | Description |
|---|---|
| Contract Title | A clear name for easy identification. |
| Related Purchase Order | Link the contract to the corresponding approved PO. |
| Vendor | The vendor associated with the purchase order. |
| Effective Date | The date when the contract becomes valid. |
| Expiry Date | The date when the contract ends or is subject to renewal. |
| Contract Value | Total monetary value as per agreement. |
| Contract Description / Terms | Outline the obligations, terms, and conditions clearly. |
2. Additional optional fields may include:
– Payment terms
– Delivery terms
– Renewal or extension clauses
– Penalty or termination conditions
Tip
All contract details will be visible to the vendor once saved.

Step 4: Save Contract
1. Click Save to finalize contract creation.
2. The contract will be automatically displayed in:
– The buyer’s contract list, and
– The vendor’s contract menu in the vendor portal.
Signing the Contract
Each contract contains a “Signed status” field with two options:
Not Signed – The contract is pending signature. The SIGN button is visible.
Signed – The contract has been signed. The SIGN button will change to “Signed” status and can no longer be clicked.
Step 1: Open the Contract
– Go to Contract Detail view of the newly created contract.
Step 2: Click SIGN
– If the contract status is Not Signed, click the “SIGN” button.
Step 3: Draw Signature
1. A signature panel will appear.
2. Draw your signature using the mouse, touchpad, or stylus.
3. Press Sign to finalize.
– Once signed, the contract status will automatically update to Signed. This action is logged in the system for audit purposes.
Discuss Tab (Contract Communication)
To make contract collaboration smoother, the Discuss tab enables secure communication between the buyer and vendor.
– Both parties can add comments, reply to messages, and view conversation history.
– Whenever a comment is posted, the other party receives a notification (web and/or email depending on settings).
Using the Discuss Tab
1. Go to the Contract Detail view.
2. Click on the “Discuss” tab.
3. Type your message or question in the text field.
4. Click “Add Comment” to send it.
Additional options:
– Edit: Buyers can edit their comments for corrections or updates.
– Delete: Buyers can delete messages if they are no longer relevant.
– Notifications: Every comment automatically triggers a system notification to the opposite party.
Note
This feature improves communication transparency and reduces the need for external emails or calls.
