Purchase Module – Commodity Group Settings Configuration Guide
Overview
The Commodity Group Settings feature allows administrators to define and manage commodity groups used in the Purchase Module. Commodity groups help categorize items systematically, making it easier to manage procurement data, generate reports, and maintain organized dropdown lists in item creation and purchase transactions.
These groups are particularly useful for organizations that handle a wide range of products across multiple categories, ensuring better control and efficiency in the purchasing process.
Accessing Commodity Group Settings
Step 1: Navigate to the Settings menu under the Purchase module from the left sidebar.
Step 2: Select Commodity Group from the menu to view the list of existing commodity groups.
Step 3: From this page, you can add, edit, or delete commodity groups as needed.
Adding a New Commodity Group
Adding a new commodity group allows you to expand the category list, making it easier to classify and manage items in the system.
Steps to Add a Commodity Group:
1. Go to the Settings menu under the Purchase module.
2. Select Commodity Group.
3. Click the “Add Commodity Group” button.

4. Fill in the following details on the Add Commodity Group page:
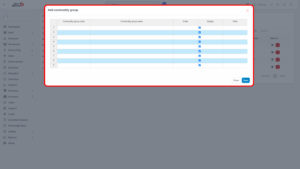
| Field | Description | Example |
|---|---|---|
| Commodity Group Code | Unique code to identify the commodity group. | 001 |
| Commodity Group Name | Descriptive name of the commodity group. | Office Supplies |
| Order | Determines the display order in dropdown lists. Smaller numbers appear first. | 1 |
| Display | Check this box to make the group visible in dropdowns. Uncheck to hide it. | ✅ Checked |
| Note | Optional field for additional remarks or information. | “Used for stationery and office equipment.” |
5. Click “Save” to complete the setup.
6. The new commodity group will now appear in the Commodity Group combo box in related forms such as Item creation and Purchase Order.
Editing an Existing Commodity Group
You may need to modify the name, order, or visibility of a commodity group over time. The system allows quick and easy edits.
Steps to Edit a Commodity Group:
1. Go to the Settings menu under the Purchase module.
2. Select Commodity Group.
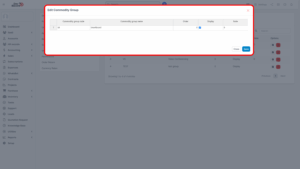
3. Hover over the commodity group you wish to modify and click the “Edit” icon.
4. Update the necessary fields such as code, name, order, or display status.
5. Click “Save” to apply the changes.
Deleting a Commodity Group
When a commodity group is no longer relevant or in use, it can be deleted to keep the list clean and organized.
Steps to Delete a Commodity Group:
1. Go to the Settings menu under the Purchase module.
2. Select Commodity Group.
3. Hover over the commodity group you want to delete and click the “Delete” icon.
4. Confirm the deletion in the pop-up confirmation window.
5. The selected commodity group will be permanently deleted.
Tip
– If items are currently assigned to the commodity group, you should reassign those items to a different group before deletion.
– Deleting a commodity group is irreversible. Proceed with caution.

Display Order and Visibility
a) Order Field: Controls the position of the commodity group in dropdown lists.
– Lower numbers = Higher priority display.
– Useful for placing frequently used categories at the top.
b) Display Checkbox:
– Checked = Commodity group appears in dropdowns.
– Unchecked = Commodity group is hidden from dropdowns but remains in the database.
– This is helpful when phasing out categories without deleting their historical data.