Understanding Purchase Order Details
Overview
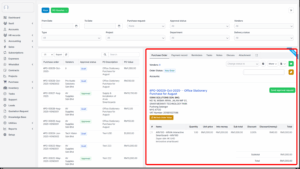
The Purchase Order Detail section provides a complete overview and control panel for managing a specific purchase order.
From this page, users can view order information, refresh pricing values, manage payments, set reminders, create internal tasks, communicate with vendors, add notes, and attach important documents.
This centralized view ensures accurate tracking of every purchase order and maintains a transparent workflow between buyers, vendors, and approvers.
Accessing Purchase Order Detail
Step 1: Navigate to the Purchase module from the left sidebar.
Step 2: Select “Purchase Order” from the menu.
Step 3: Choose the specific purchase order you want to manage.
Step 4: Click “View” to open the Purchase Order Detail page.
Refresh Order Value
– This function updates the total value of the purchase order according to the current purchase price of the items in the system.
– It is especially useful if there have been price changes since the PO was initially created.
– Note: This button is only visible when the PO status is Draft, Rejected, or Canceled.
How to Refresh Order Value:
1. Open the Purchase Order Detail page.
2. Click “Refresh Order Value”.
3. The system will automatically recalculate the PO total based on the current item purchase prices.
4. Updated values are reflected immediately.
Payment Record
The Payment Record feature allows users to record direct payments related to a specific purchase order. This can only be done once the PO has been approved.
There are two possible cases:
Case 1: PO Without Purchase Invoice
If the PO does not have an associated invoice, the system will automatically create a Purchase Invoice when a payment is recorded.
Steps:
1. Create an approval process for Payment Request in Approval Settings (if required).
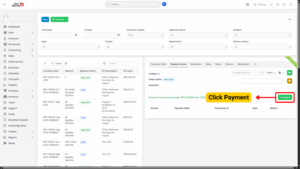
2. Go to Purchase Order Detail → Select Payment Record tab.
3. Click “Payment” button.
4. Enter:
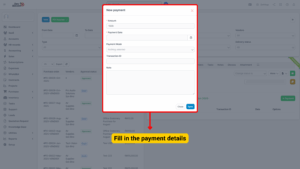
– Amount to Pay
– Payment Date
– Payment Mode (e.g., Cash, Bank Transfer, Cheque)
5. Click Save.
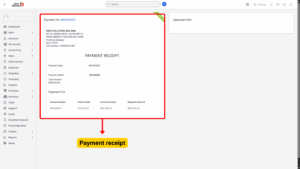
6. Go to the payment detail page to review payment status.
7. Send Approval Request if an approval process is set up and wait for approvers to Approve or Deny.
Tip
System will generate a Purchase Invoice automatically with the entered payment amount.

Case 2: PO With Existing Invoice
If the PO already has an associated invoice, the system will auto-fill the Purchase Invoice information during payment creation.
Steps:
1. Create an approval process for Payment Request in Approval Settings (if required).
2. Go to Purchase Order Detail → Select Payment Record tab.
3. Click “Payment” button.
4. Select the Purchase Invoice from the dropdown list.
5. Enter:
– Amount
– Payment Date
– Payment Mode
6. Click Save.
7. Go to the payment detail page to review payment status.
8. Send Approval Request and proceed with the approval workflow.
Reminders
The Reminders feature helps users schedule and track important follow-ups related to a purchase order. These reminders can be used to notify team members of vendor commitments, delivery dates, payment due dates, or other important actions.
– Notifications appear in web notifications and are sent only to selected employees.
– If the “Send also an email for this reminder” checkbox is selected, an email notification will also be sent.
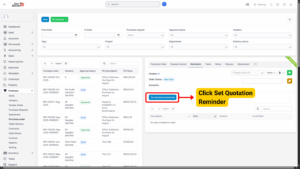
How to Set a Reminder:
1. Go to Reminders tab in the Purchase Order Detail page.
2. Click “Set Estimate Reminder”.
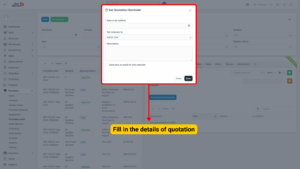
3. Fill in the required details:
– Reminder Date & Time
– Recipients (Employees)
– Description / Notes
– (Optional) Check “Send also an email for this reminder”
4. Click Save.
Note
Recipients will receive notifications on the set date and time.

Task Management
Buyers can create internal tasks related to a purchase order to manage internal workflows. Tasks can be assigned to employees for activities like inspection, follow-up, or receiving coordination.
– Vendors cannot view these internal tasks.
– Tasks can be updated, tracked, or deleted by the buyer.

How to Create a Task:
1. Go to Task tab in the Purchase Order Detail page.
2. Click “New Task”.
3. Enter:
– Task Name
– Description
– Assigned Employee
– Due Date
4. Click Save.
Discuss (Buyer–Vendor Communication)
The Discuss tab enables direct communication between buyers and vendors regarding the specific purchase order.
Messages sent by the buyer are visible to the vendor and vice versa.
– The PO does not need to be approved for vendors to view and participate in the discussion.
– Both parties can exchange messages in real time.
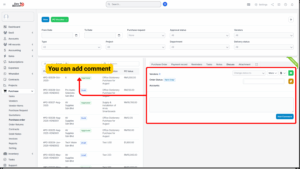
How to Add a Comment:
1. Go to Discuss tab in the Purchase Order Detail page.
2. Enter your message in the comment box.
3. Click “Add Comment”.
4. The other party (buyer/vendor) will receive a notification.
Notes (Internal Use Only)
The Notes feature allows buyers to create private notes related to the purchase order. These notes are not visible to vendors, making it ideal for internal remarks or references.
– Buyers can add, edit, and delete notes at any time.
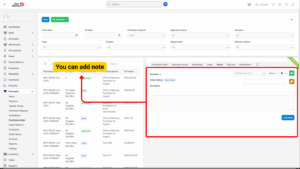
How to Add a Note:
1. Go to Notes tab.
2. Click “New Note”.
3. Enter note content.
4. Click Save.
Attachment Management
The Attachment tab allows both buyers and vendors to upload and view files related to the purchase order.
This ensures that all supporting documents are stored and accessible in one location.
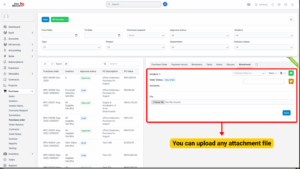
How to Add an Attachment:
1. Go to Attachment tab in the Purchase Order Detail page.
2. Click “Attach File”.
3. Select the file from your computer (PDF, DOCX, image, etc.).
4. Click Upload.