Vendor–Items Management Guide
Overview
The Vendor–Items feature allows you to define and manage the specific items that are associated with each vendor in your purchasing system. When enabled, this feature ensures that during the creation of Quotation, Purchase Order, Debit Note, or Purchase Invoice transactions, only items linked to the selected vendor will be automatically loaded or displayed.
This function simplifies the purchasing process, reduces human error, speeds up data entry, and helps maintain accurate vendor–item relationships.
Step 1: Accessing the Vendor–Items Menu
To set up vendor-item relationships:
1. Log in to the Admin Portal.
2. From the left sidebar, go to the Purchase module.
3. Select Vendor–Items from the menu.
You will be redirected to the Vendor–Items Management Page, where you can:
– View existing vendor-item relationships,
– Create new mappings between vendors and items,
– Edit or delete existing mappings.
Tip
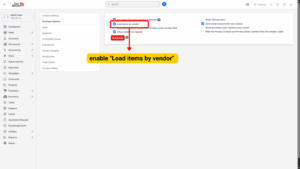
If “Load items by vendor” is enabled in your system settings, only these mapped items will appear during purchase transactions for that vendor.

Step 2: Adding a New Vendor–Items Relationship
To add a new mapping between a vendor and its items:
1. On the Vendor–Items page, click the New button at the top right corner.
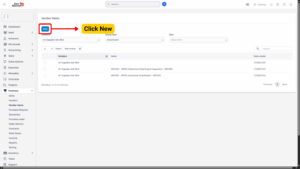
2. The New Vendor–Items Form will appear.
3. Fill in the following fields:
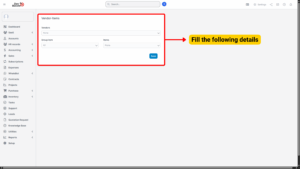
a) Vendor
– Select a Vendor from the dropdown list.
– This vendor must already be registered in the Vendor module.
– The selected vendor will be the supplier for the chosen items.
b) Group Items
– Select a Commodity Group to easily filter and categorize available items.
– Grouping helps in quickly selecting items relevant to the vendor.
c) Items
– Select one or multiple items that are supplied by the chosen vendor.
– These items should already exist in the Items module.
– You may scroll through the list or use the search bar to find specific items faster.
4. Once all fields are completed, click the Save button to finalize the mapping.
Step 3: How Vendor–Items Work in Transactions
When this configuration is active and “Load items by vendor” is enabled in system settings, the system will:
Automatically display or load the predefined items associated with the selected vendor when creating:
– Purchase Quotations
– Purchase Orders
– Debit Notes
– Purchase Invoices
Restrict the item dropdown list to only items linked to the chosen vendor, preventing users from selecting items not supplied by that vendor.
Benefits of using Vendor–Items mapping:
– Faster transaction creation.
– Higher data accuracy.
– Prevents accidental purchase from wrong suppliers.
– Clear visibility of vendor-specific catalogs.
Step 4: Editing Vendor–Items Mapping
To update or modify the relationship between a vendor and its items:
1. Go to Vendor–Items menu in the Purchase module.
2. Hover over the vendor-item record you wish to edit.
3. Click the Edit icon.
4. Make necessary changes (e.g., add or remove items, change item groups).
5. Click Save.
Note
Changes will immediately take effect on future transactions. Past transactions will remain unchanged.

Step 5: Deleting Vendor–Items Mapping
If a vendor no longer supplies certain items, you can delete the mapping:
1. Go to the Vendor–Items page.
2. Hover over the mapping to be removed.
3. Click the Delete button.
4. Confirm the deletion in the pop-up dialog box.
Once deleted:
– The vendor will no longer be associated with the removed items.
– Those items will not be available during purchase transactions for that vendor.