Managing and Overview Quotation
Managing quotations effectively is an important part of the sales workflow. Quotations provide customers with a formal offer, and in the system, they can be updated, tracked, and converted into further actions. Below is a step-by-step guide on how to manage quotations.
View Quotation Details
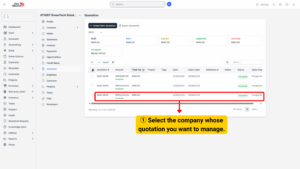
1. From the sidebar menu, click on Accounts. A list of companies will appear. Select the company whose quotation you want to manage.
2. Inside the selected company’s account, click Quotations from the sidebar. This will display all quotations related to that company.
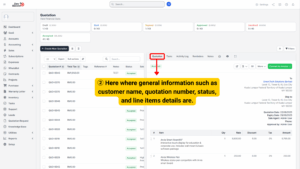
3. When you open a quotation, you are taken to the quotation detail page. This page contains all the essential information and supporting sections needed to understand and manage the quotation.
a) Quotation Details – This section shows the main information of the quotation such as the customer’s name, quotation number, date, current status (e.g., draft, sent, approved, expired, declined), and the list of line items.
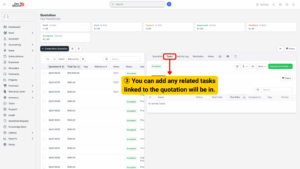
b) Tasks – If there are tasks linked to the quotation, they will appear here. These may include follow-ups with the customer, internal approvals, or steps required before the quotation can move forward. This ensures that team members can keep track of related actions without losing context.
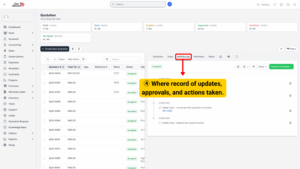
c) Activity Log – This is the history or timeline of all activities related to the quotation. It records actions such as when the quotation was created, edited, sent, approved, or declined. The activity log is useful for tracking progress, ensuring accountability, and providing a clear audit trail.
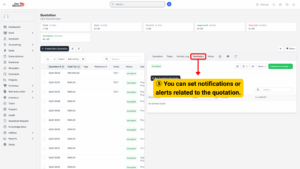
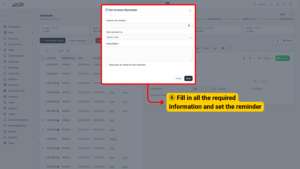
d) Reminders – Here you can view or set reminders related to the quotation. For example, you may schedule a reminder to follow up with the client before the quotation expires. This helps ensure no quotation is forgotten or left pending without action.
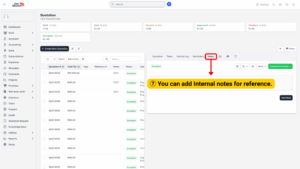
e) Notes – This section is for internal use only. You can write down additional details, comments, or instructions for your team. Notes are not visible to the customer but help keep important information centralized and accessible to colleagues.
Manage Quotation Actions
Once you are inside the quotation, you will find different actions that allow you to manage and control its progress. These actions help you decide what to do next with the quotation, depending on its status and the client’s response.
a) Edit – You can make changes to the quotation such as updating customer information, adjusting product or service line items, changing quantities, discounts, or taxes. This is useful if the client requests modifications before approval.
b) View or Download PDF – Generate a professional-looking PDF version of the quotation. This can be downloaded for your records, shared internally, or sent to the client as an attachment. Having a PDF ensures that both parties have a fixed, non-editable copy of the offer.
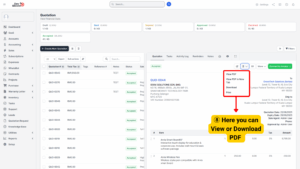
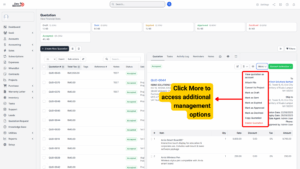
c) Click More – Under the More button, you will find additional options to manage the quotation. These include:
– View as Account – Preview how the client will see the quotation from their portal or account view.
– Attach File – Add supporting files such as signed contracts, purchase orders, or related documents.
– Convert to Project – If the quotation has been approved and work needs to begin, you can directly convert it into a project. This ensures a smooth transition from sales to execution.
– Mark as Draft – Move the quotation back to draft status if further internal changes or corrections are required.
– Mark as Sent – Update the status to indicate the quotation has been officially sent to the client.
– Mark as Expired – Change the status to expired when the quotation is no longer valid (e.g., past its validity date).
– Mark as Approved – Mark the quotation as approved once the client has accepted it.
– Mark as Declined – Record that the quotation has been rejected by the client. This helps maintain accurate sales records.
– Copy Quotation – Create a duplicate of the quotation. This is especially useful if you need to prepare a similar quotation for the same or another client without starting from scratch.
– Delete Quotation – Permanently remove the quotation from the system if it is no longer needed. Use this option with caution, as deleted quotations cannot usually be recovered.
Note
Always update the quotation’s status (Sent, Approved, Expired, Declined)
to keep accurate sales tracking and reports.
Tips
Use Copy Quotation instead of creating a new one from scratch when dealing
with repeat customers. It saves time and ensures consistency.