How to Add a New Task
The Tasks feature is one of the most important tools within a project. It allows you to divide a large project into smaller, actionable items that can be assigned to specific team members. Tasks can include deadlines, priorities, billing rates, and links to other modules, ensuring that every aspect of project work is organized and transparent.
Create a Task
1. Go to the Tasks section within your project.
2. Click + New Task.
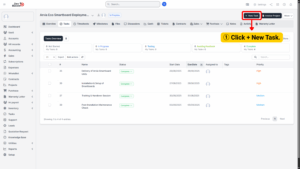
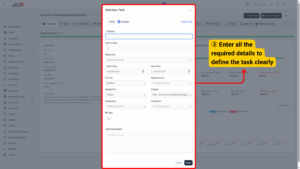
3. A task creation form will appear where you can enter the task’s details.
Fill in Task Information
When creating a task, it’s important to provide complete and accurate details. Below are the fields you will see and their purposes:
a) Subject: This is the title of the task. Use a short and descriptive name. A clear subject helps team members instantly recognize the task.
b) Hourly Rate: Define the billing rate for this task. This is important if the project billing type is based on time spent (Task Hours).
c) Milestone: Link the task to an existing milestone. This ensures the task contributes directly to achieving a larger project checkpoint.
d) Start Date & Due Date: Set the timeline for the task. The Start Date marks when work should begin, while the Due Date sets the deadline. This helps manage workloads and ensures timely delivery.
e) Priority: Select a priority level — Low, Medium, High, or Urgent. Use this to guide team members on which tasks to focus on first.
f) Repeat Every: If the task is recurring, set how often it should repeat.
g) Related To: Link the task to another module in the system. This creates a direct connection to the item the task supports. Options include:
f) Assignees: Select the team members responsible for completing the task. Assigning the right people ensures accountability and ownership.
h) Followers: Add members who should stay updated on the task’s progress but are not directly responsible. This is useful for managers, supervisors, or clients who need visibility.
i) Tags: Use tags to categorize tasks. Tags make it easier to filter and search tasks later.
j) Task Description: Provide a detailed explanation of the task requirements. Be as specific as possible, including instructions, goals, or reference materials.
After filling in all information, review the details for accuracy.
– Click Save.
The new task will now appear in the Task List of your project. From here, you can monitor its progress, update status, and log time spent.