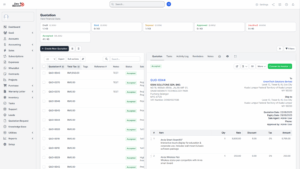
Creating a Quotation
Quotations are one of the most important documents in the sales process, as they provide potential customers with a clear breakdown of products or services, pricing, discounts, and terms. In the system, creating a quotation is simple and efficient because most of the details are automatically linked to the account selected. Below is a step-by-step guide on how to create a new quotation.
Select the Account
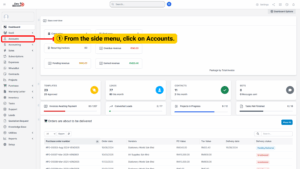
1. To begin creating a quotation, you must first access the Accounts section of the system. This ensures that the quotation is properly linked to an existing customer record.
2. Navigate to Account from Dashboard. From the side menu, click on Accounts. A list of available accounts will be displayed. Select the account for which you wish to create a quotation.
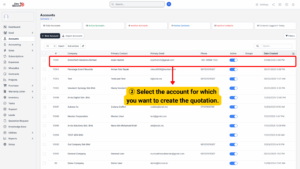
3. Each account contains key account information such as company name, contact person, billing address, delivery address, and related documents.
Note
If the customer account does not exist, it must first be created in the system before proceeding with a quotation.
This ensures the account information (such as company name, billing address, and contact details)
is available for auto-filling in the quotation form.
Access the Quotation Module
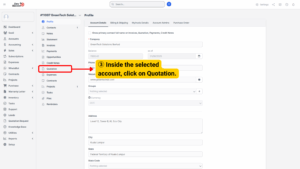
1. Once the desired account is selected, navigate to the Quotation tab located within the account. Click on Quotation to proceed.
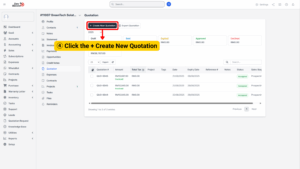
Enter Quotation Information
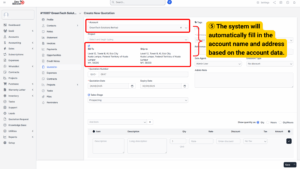
At the top of the quotation form, the system automatically fills in key details from the selected customer account:
a) Account Name: The name of the customer or organization.
b) Address: The billing and delivery addresses linked to the account.
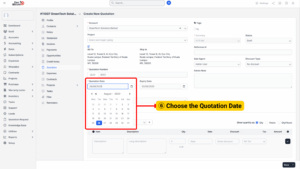
c) Quotation Date: Select the date the quotation is issued. This marks the start of the quotation’s validity period.
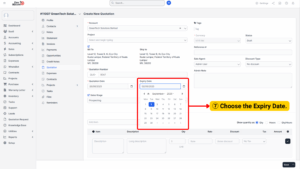
d) Expiry Date: Define the last valid date for the quotation. After this date, the offer is no longer valid unless extended.
e) Sales Stage: Choose the stage that reflects the current progress.
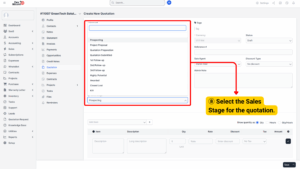
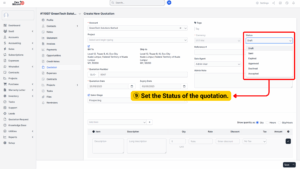
f) Status: Set the status of the quotation, such as Draft, Sent, Approved, or Declined
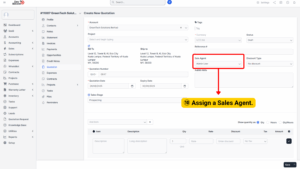
i) Sales Agent: Assign the quotation to a sales agent responsible for follow-up and customer communication.
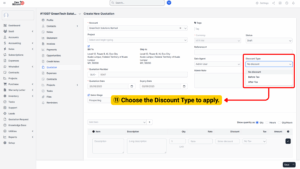
j) Discount Type: Select whether the discount will be applied as a percentage or as a fixed amount.
Tip
Keeping the quotation details accurate and up-to-date is crucial for reporting, sales tracking, and customer communication.
Add Item Details
1. The Order Lines section of the quotation allows you to specify the products or services being offered. Each line requires:
a) Item Name: Select the product or service from the product catalog.
b) Description: Provide details or specifications of the item.
c) Quantity: Enter the number of units being quoted.
d) Rate: Specify the price per unit.
e) Discount (if applicable): Apply any discount, based on the previously selected discount type.
f) Tax: Choose the applicable tax rate(s).
2. As items are added, the system automatically calculates the line totals and updates the quotation total
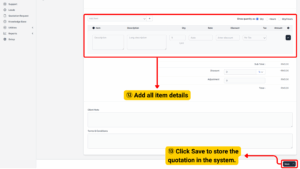
3. Once all details are entered and verified, click Save. The quotation will be stored in the system under the selected account and can be accessed or modified later if required.
