Creating a New Invoice
The Invoice Module allows businesses to issue invoices manually, ensuring proper documentation of sales transactions, services rendered, or project-related billing. A manually created invoice gives flexibility to include customized details and ensures compliance with financial and tax requirements. Below is a detailed guide on how to create a new invoice from scratch.
Access the Invoice Section
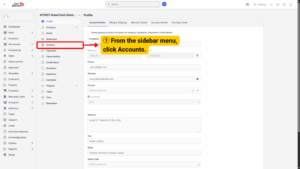
1. Begin by navigating to the Accounts option in the sidebar menu.
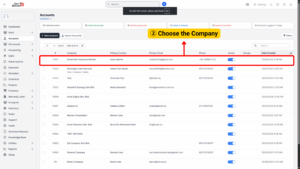
2. Choose the Company for which the invoice should be created, ensuring it is linked to the correct customer profile.
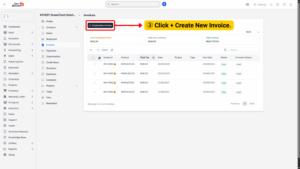
3. Open the Invoices tab to view all invoices associated with that company. To generate a new invoice, click the + Create New Invoice button located at the top of the page.
Fill in Invoice Details
Once the invoice form opens, complete the required fields carefully:
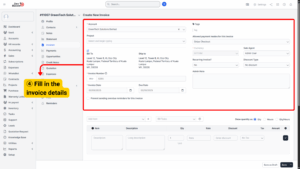
– Project: If the invoice is linked to a specific project, select the project name from the dropdown. This helps in project-based billing.
– Invoice Date: Enter the date the invoice is being issued.
– Due Date: Set the payment due date, based on your agreed payment terms.
– Tags: Use tags for easier categorization and reporting (e.g., “Consulting,” “Maintenance,” “Retainer”).
– Allowed Payment Modes: Choose the payment methods accepted for this invoice (e.g., Bank Transfer, Credit Card, Cash, Cheque).
– Sales Agent: Assign the sales agent responsible for this invoice if applicable.
– Recurring Invoice?: Indicate whether the invoice should be recurring (e.g., monthly subscription billing).
– Discount Type: Choose whether discounts apply Before Tax, After Tax, or No Tax. This ensures the system calculates totals according to your billing policy.
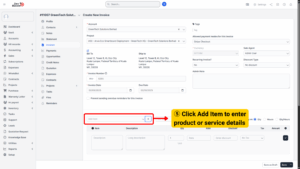
Add Items to the Invoice
1. Click the Add Item button to begin entering products or services.
2. Fill in the following details for each line item:
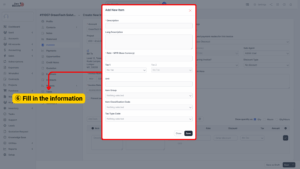
– Description: Short name of the item/service.
– Long Description: Detailed explanation of the service or product being billed.
– Rate (MYR – Base Currency): Unit price of the item or service.
– Tax 1: Select the applicable tax code.
– Unit: Specify the unit of measurement.
– Item Group: Categorize the item under a group.
– Item Classification Code: Standard classification for accounting or compliance reporting.
– Tax Type Code: Select the correct tax type for compliance with financial regulations.
3. Alternatively, you can enter item details directly under the Add Item button.
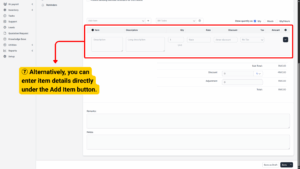
4. The system will automatically calculate the total amount, including applicable discounts and taxes.
5. Add Remarks and Notes if required.
6. Once all information is complete, click Save.
By following these steps, invoices can be efficiently managed, recorded, and converted into E-Invoices, ensuring compliance with Malaysian LHDN regulations.