Item Detail & Serial Number Management Guide
Inventory Module – View Item Information & Manage Serial Numbers
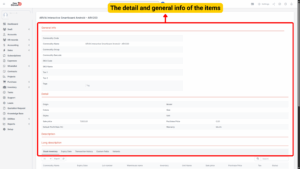
1. Item Detail Overview
The Item Detail page provides a complete overview of a product’s information, including general details, properties, inventory data, transaction history, custom fields, and variations. This page centralizes all product-related data, making it easy for users to manage, track, and review individual items.
Step-by-Step: Viewing Item Details
Step 1: Navigate to Items
– Go to the Inventory module from the left sidebar.
– Select Items.
Step 2: Open Item Detail View
– Hover over the item you want to view.
– Click “View”.
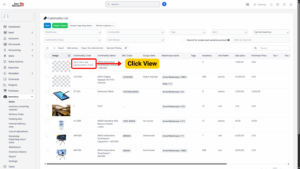
You will be directed to the Item Detail page.
2. Item Detail Page – Tabs and Information
| Section | Description |
|---|---|
| General Info | Displays all data entered in the General Info tab during the item creation process. This includes Commodity Code, Commodity Name, Barcode, SKU, Price, Unit, Group, Subgroup, Tax, etc. |
| Detail | Shows the information entered in the Properties tab of the Add Item form. Examples: Origin, Style, Model, Size, Color, Warranty, and product behavior settings (Can be sold, Can be purchased, etc.). |
| Description | Displays data entered in the Description field of the General Info tab during item creation. |
| Long Description | Displays data entered in the Long Description field of the Properties tab. Useful for product specifications, materials, or usage instructions. |
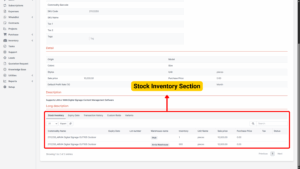
| Stock Inventory Tab | Shows the product’s stock information, including: • Warehouse location • Lot number • Expiry date • Current inventory quantity. |
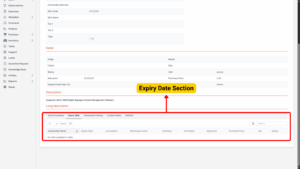
| Expiry Date Tab | Lists products with expired dates (if Expiry Date was entered upon receiving the product into the warehouse). This helps track items nearing expiration for timely action. |
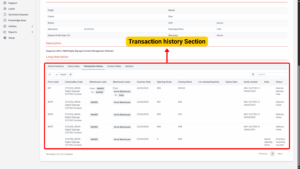
| Transaction History Tab | Displays complete movement history of the product, including: • Inventory receipts • Deliveries • Transfers between warehouses • Adjustments • Beginning and ending inventory for each transaction. |
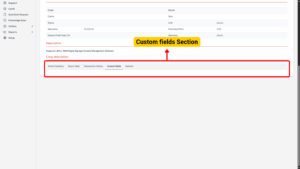
| Custom Fields Tab | Displays any custom fields defined for the item via the Custom Field Settings. Useful for storing additional business-specific data. |
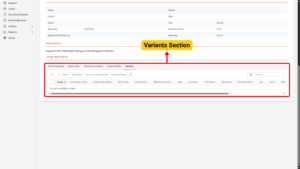
| Variants Tab | Displays all product variations associated with the item (e.g., size, color, storage capacity). Variants are listed with their respective codes, prices, and stock details. |
Tip
Using tabs effectively allows for faster access to product-related data without having to navigate multiple screens.

3. Serial Number Management
The Serial Number function allows users to add or update serial numbers for products. Serial numbers are essential for tracking individual items, ensuring better control over warranty, returns, repairs, and after-sales service.
Step-by-Step: Accessing Serial Number Management
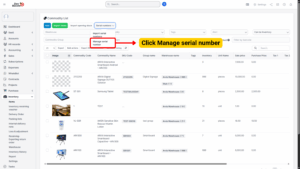
Step 1: Navigate to Serial Numbers
– Go to Inventory Module → Items from the left sidebar.
– Click “Serial numbers” at the top right of the Items page.
This will open a screen displaying items eligible for serial number entry or update.
Step 2: Filter by Serial Number Action Type
a) Add Serial Numbers for Items
– Displays items with inventory quantity > 0 but missing serial numbers.
– You can add serial numbers to match the inventory count.
b) Update Serial Numbers for Items
– Displays items with inventory quantity > 0 and complete serial numbers.
– You can update existing serial numbers if needed.
⚠️ Note:
Each unit of inventory should have a unique serial number.
For example, if an item has an inventory of 5, it should have 5 serial numbers.
Note
Each unit of inventory should have a unique serial number.
For example, if an item has an inventory of 5, it should have 5 serial numbers.

Step 3: Export Item List
1. Select the items you want to add or update serial numbers for.
2. Click “Export the selected item”.
3. Click “Download items list”.
This will generate an Excel file containing all the selected items and their current serial number status.
Step 4: Edit Serial Numbers in Excel File
– Open the downloaded file.
– Update the Serial Number column with the correct values.
– Do not modify the structure of the file (do not add/remove columns or rows).
– Only the Serial Number column (blue) can be edited. The orange columns are system-generated and must remain unchanged.
Excel Column Explanation
| Column | Description |
|---|---|
| ID | Indicates whether the serial number exists: • 0 = No serial number yet (new)• 1 = Serial number exists (can be updated) |
| commodity_id | System ID of the product (from Items table). |
| Warehouse | Warehouse where the product inventory is stored (from warehouse_id). |
| inventory_manage_id | ID from the Inventory Manage (stock) table. |
| Commodity Name | Product name (for reference only). |
| Serial number | The only editable field. Enter or update the serial number here. |
Info
Each serial number must be unique for each product unit.

1. Save the updated Excel file.
2. Return to the Serial Number Management screen.
3. Click “Choose File” and select the edited Excel file.
4. Click “Import”.

Upon successful import:
– Serial numbers will be assigned or updated for each product unit.
– You can view serial numbers from the item detail or serial number list.
Step 6: Handling Import Errors
If the import fails:
– An “Error file download” button will appear.
– Click the button to download the error file.
– Review the error details in the file to identify:
Duplicate serial numbers
Invalid formats
Missing required fields
– Correct the errors and re-import the file.
Tip
Always double-check the serial number format and ensure the number of serials matches the inventory quantity.